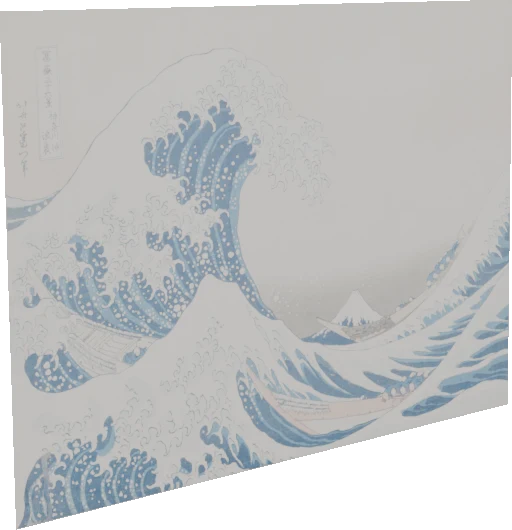
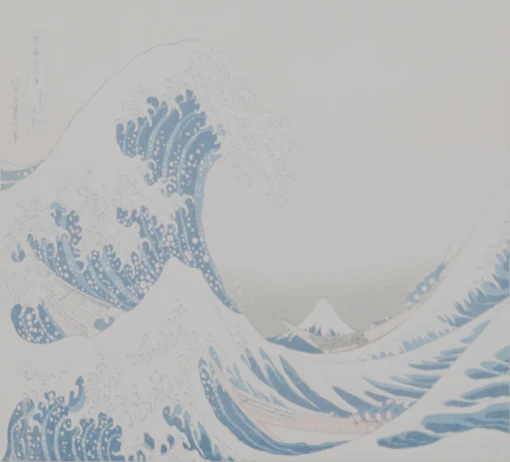
Turn photos into textures without leaving Blender. Select the part you want in the Image Editor, press Enter, and it lands in the scene as a UV-mapped plane.
For Blender 4.5 LTS to 5.2, on Windows, macOS and Linux.
Every tool draws into the same selection. Cut a rectangle with Four-Corner, remove a section with the Lasso, add a missed corner with Smart Select, and it is still one shape with one undo history.
Extracting keeps the selection, so you can adjust it and extract again.
Shiftadd to it
Ctrlcut from it
ShiftCtrlkeep the overlap
CtrlZstep back
Escback out one level
Shot at an angle?
Four-Corner Selection
Click the four corners. Drag an orange dot to bend an edge that bows, or a pill to round the corners off. The shape stays editable until you start a new one.
Turn on Rectify Perspective and the texture comes out square, as if the photo had been taken straight on.
Enter Extract
G Move the shape
Shift Round one corner
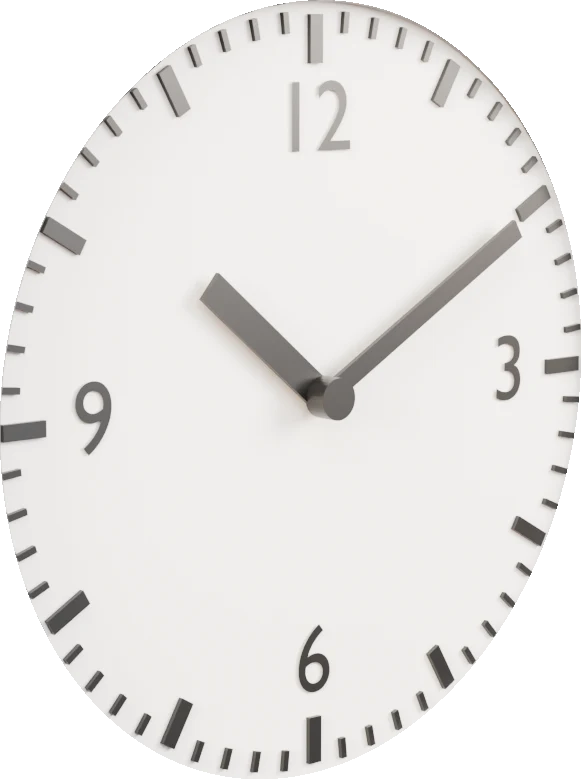
Round objects at an angle?
Circle / Oval Cutout
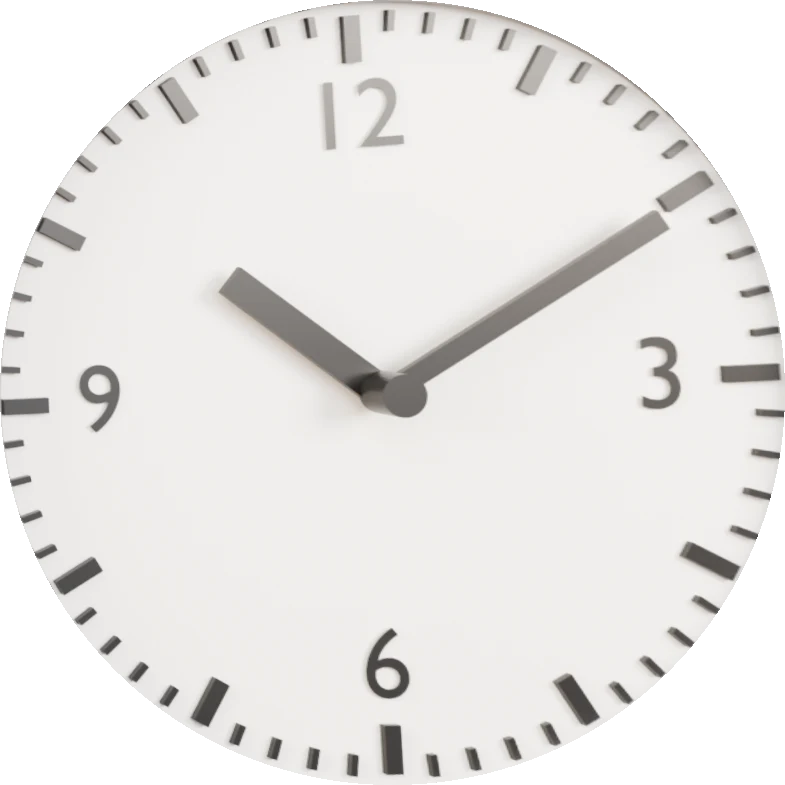
Drag out an oval and Edge Magnet pulls it onto the rim. Rectify to Circle flattens the result into a true circle, with a live preview beside the oval while you adjust it.
Close up and steep? Slide the tilt ring onto the object's real middle and the perspective comes out right.
Shift Resize both sides
Ctrl Drag without the magnet
Alt click a pill to make it a circle
Hard edges, odd angles.
Polygonal Cut
Click your way around the shape and close it on the first point. Every point stays draggable afterwards, and any side can be pulled into a curve, so a sign with rounded corners is still only a few clicks.
Enter Close, then extract
G Move the shape
Delete Remove a point
Free Hand Cut
Lasso
Hold the mouse button and draw around the area you want. The shape is applied the moment you release. Strokes stay precise at any zoom level, so you can cut out a whole object or tidy up a few pixels along its edge, and each stroke can be undone on its own.
Shift Add a stroke
Ctrl Cut a stroke out
Too lazy to trace? One click.
Smart Select
Click once on an object and Smart Select traces its outline for you. Shift-click to grow it or to pick up the next object, Ctrl-click to drop a part you did not want. The first click on a new image takes about two seconds. After that, each click comes back in around 50 ms.
Contiguous and Global Color modes select by color instead, which suits flat graphics and painted surfaces. Clean Up Strays fills the pinholes and drops the specks a click leaves behind.
Object mode runs a small segmentation model that ships inside the add-on and runs on the CPU. It needs no internet connection and never sends an image anywhere. It does not generate or change pixels. It only finds the edge of what was clicked.
Shift Grow or add
Ctrl Remove a part
F Fill holes
ShiftF Remove islands
Same selection, setting off and on
Three settings that change what comes out the other end.
Rectify Perspective
Rectify to Circle
Feather
What is exported into the scene
A plane at the 3D cursor, sized to the cutout, with UVs and a material already wired up: the image, its alpha and a Principled BSDF. Drop it into a shot and it renders.
Turn on Fit Mesh to Cutout and the mesh follows the visible outline instead of a rectangle. Holes, concave edges and separate pieces all survive, and Simplify Outline keeps the vertex count reasonable without ever cutting into the picture.
The texture is packed into the .blend by default, or saved as a PNG next to it. Nothing overwrites an existing file. HDR and EXR sources stay in float. Offset grows or shrinks the edge by up to 50 px, and Feather softens it by up to 50 px.
Requirements
Blender
4.5 LTS to 5.2 (Intel Macs: 4.5). Developed and tested on 5.2.
Systems
Windows x64, macOS 13+ on Apple Silicon or Intel, Linux x64. Each system has its own zip.
Install
Edit > Preferences > Get Extensions > Install from Disk, then pick the zip for your system. The tools live in the Image Editor sidebar (N) under Texture Extractor.
One-time purchase, yours forever.
All future updates and support included. Texture Extractor is in active development, and questions before or after purchase are more than welcome. Just drop a message.
Questions
Does Smart Select need a GPU?
No. It runs on the CPU. On a 6-core desktop the first click on a new image takes about 1.8 seconds while the model reads the picture, and every click after that takes around 50 ms.
Are my images uploaded anywhere?
No. The add-on never touches the network. Everything, including Smart Select, runs inside Blender on your machine.
Is there compiled code in the zip?
One file: a trimmed build of OpenCV 4.11 for your system, used by Smart Select, Offset and Feather. It is built in public from OpenCV's official source at github.com/Omar-Ga/texture-extractor-opencv, which lists the patches and settings, signs a record of each build, and lets anyone rebuild it and get the same bytes. Everything else is readable Python.
Why is the download around 300 MB?
Most of it is the segmentation model behind Smart Select's Object mode, which ships inside the zip so nothing has to be fetched later. Each platform zip only carries the OpenCV build for that system.
Can I get a real mesh instead of a plane with transparency?
Yes. Turn on Fit Mesh to Cutout under Output. The mesh follows the visible outline, keeps holes and separate pieces, and uses the same UVs and placement as the plane. Very noisy edges can produce a lot of vertices, so above 100,000 it asks first.
Will it flatten a label wrapped around a bottle?
Not fully. Rectify Perspective straightens flat surfaces shot at an angle, and Rectify to Circle handles round flat faces like clocks and lids. A label that curves around a cylinder keeps some of that curve.
Does it work with EXR and HDR photos?
Yes. Float images stay float, in their original color space. PNG cannot hold those values, so HDR extractions are packed into the .blend rather than exported.
Can I change the selection after extracting?
Yes. Extracting keeps the selection and its handles, so you can adjust it and extract again. Every extraction gets a new name and never replaces the last one.